
For our last week of the session, all of the classes started off learning about drawing and watercolor resists. The 1s and 2s classes used oil pastels as their drawing medium, which provide smooth deep pigments and work well in resisting the paint.

After taking a few moments to draw, the children were anxious to work with the liquid watercolors. I've learned by now that using a tray is a must when offering any kind of liquid to toddlers!

For the 1s class, I use jars for the liquid watercolor rather than the paint cup base that the older kids use. The 1 yr olds love to practice their pouring skills by transferring the watercolors back and forth between the jars... a skill that I like to encourage!


The children experimented with eye-droppers, coffee filters, and a few other tools they found on the shelf.

The 3s/4s class began with a still life drawing of a rose. I offered them black Sharpie markers (explaining that they are important "grown-up markers") to carefully draw the lines and shapes of the rose. Most of the kids just drew whatever they pleased- grasping the concept of a still life will take a little more practice! After the drawing session, I brought out the liquid watercolors to add to their work.


Glitter became a key medium in this project!

After working with watercolors, the 1s and 2s classes got to experience the joys of foam painting! Foam paint is like shaving cream, without the toxic smells. I squirted some onto each tray and the kids enjoyed the sensory experience of lathering it over their hands and arms.


Then they added paint to the foam to create swirls of color.

The trays soon became a station for messy sensory discovery. The children used all kinds of tools and added water and glitter to the mix.


For the 1s classes I offered an extra layer of sensory by squirting the foam onto bubble wrap.


The mixture of water, foam, paint, and bubble wrap was delightful!

The 3s and 4s class moved on from their watercolor resists, to a different kind of watercolor collage. First they used a sponge and water to wet their paper. Then they placed small pieces of "bleeding tissue paper" into a collage design (when wet, the tissue paper releases it's color). If needed, they used the sponges to moisten the tissue paper as well. When the tissue paper dries, it will fall off and leave a colorful design in it's place!


Outside the 2s and 3s/4s classes worked on their spray bottle skills, spraying liquid watercolor onto a cloth and bulls eye paper.

The bulls eye spray game was something we
tried out last summer. The kids love to aim and shoot!


 For our last week of the session, all of the classes started off learning about drawing and watercolor resists. The 1s and 2s classes used oil pastels as their drawing medium, which provide smooth deep pigments and work well in resisting the paint.
 After taking a few moments to draw, the children were anxious to work with the liquid watercolors. I've learned by now that using a tray is a must when offering any kind of liquid to toddlers!
 For the 1s class, I use jars for the liquid watercolor rather than the paint cup base that the older kids use. The 1 yr olds love to practice their pouring skills by transferring the watercolors back and forth between the jars... a skill that I like to encourage!


 The children experimented with eye-droppers, coffee filters, and a few other tools they found on the shelf.
 The 3s/4s class began with a still life drawing of a rose. I offered them black Sharpie markers (explaining that they are important "grown-up markers") to carefully draw the lines and shapes of the rose. Most of the kids just drew whatever they pleased- grasping the concept of a still life will take a little more practice! After the drawing session, I brought out the liquid watercolors to add to their work.


 Glitter became a key medium in this project!
 After working with watercolors, the 1s and 2s classes got to experience the joys of foam painting! Foam paint is like shaving cream, without the toxic smells. I squirted some onto each tray and the kids enjoyed the sensory experience of lathering it over their hands and arms.

 Then they added paint to the foam to create swirls of color.
 The trays soon became a station for messy sensory discovery. The children used all kinds of tools and added water and glitter to the mix.


 For the 1s classes I offered an extra layer of sensory by squirting the foam onto bubble wrap.


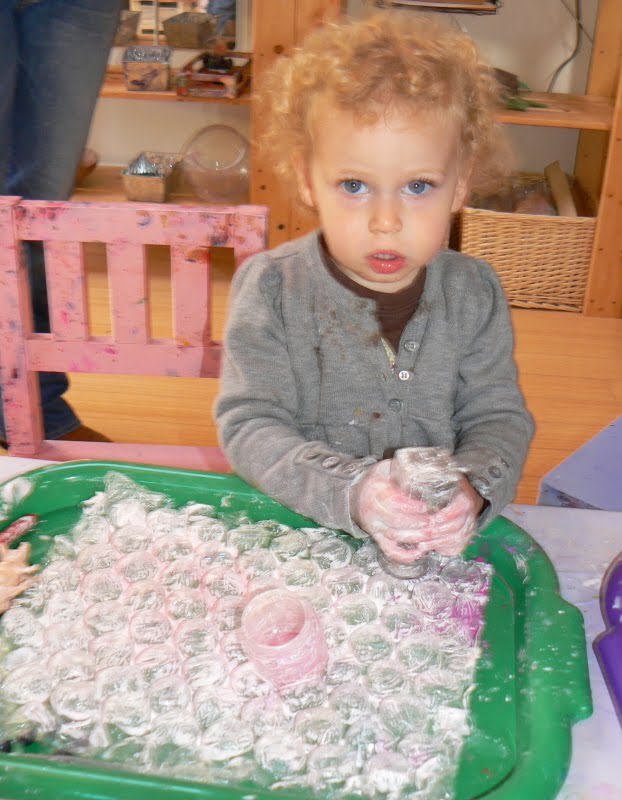

 The mixture of water, foam, paint, and bubble wrap was delightful!
 The 3s and 4s class moved on from their watercolor resists, to a different kind of watercolor collage. First they used a sponge and water to wet their paper. Then they placed small pieces of "bleeding tissue paper" into a collage design (when wet, the tissue paper releases it's color). If needed, they used the sponges to moisten the tissue paper as well. When the tissue paper dries, it will fall off and leave a colorful design in it's place!

 Outside the 2s and 3s/4s classes worked on their spray bottle skills, spraying liquid watercolor onto a cloth and bulls eye paper.
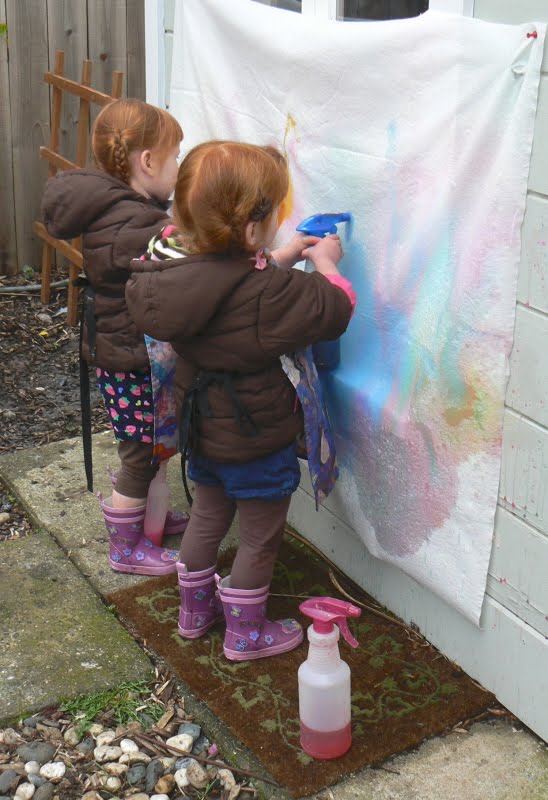 The bulls eye spray game was something we tried out last summer. The kids love to aim and shoot!


