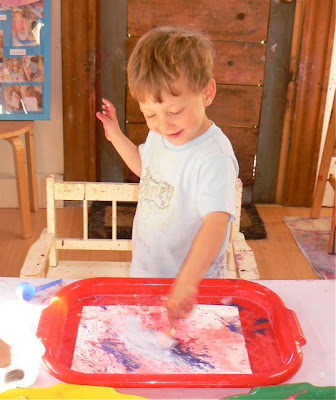
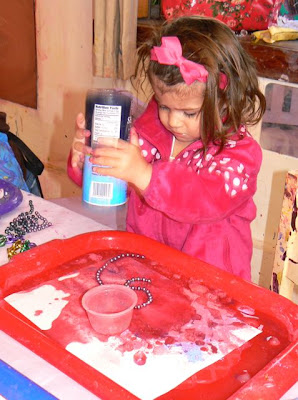
For the last week of the 1s class, we began with oil pastel drawing on watercolor paper. Drawing is still fairly new to these kids, they're still learning how to scribble and press down at the same time. Oil pastels are great for little ones because they are rich in color and will show up even with the lightest touch.
After using the oil pastels, I offered the children small squares of bleeding tissue paper to place over their drawings. Then they soaked the tissue paper with water (trying hard to squeeze the spray bottle triggers). As the color from the tissues began to bleed onto the paper, the kids added glitter and found some tools to move the tissues around. Once the tissues dry, they will fall off and leave a beautiful painting in their place.
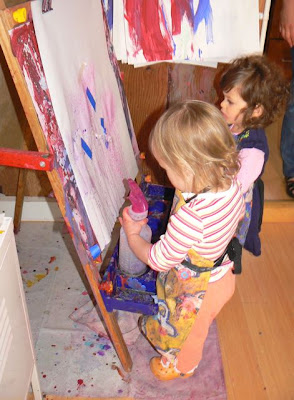
Soon, the kids were moving around the studio, painting at the easels and trying out the splat painting that the older classes were working on.
The 1s group wasn't so interested in throwing the cotton balls for the splat painting, but they enjoyed working with the materials in other ways!
Towards the end of class a couple of kids saw a plate of paint on the floor and began to take off their shoes. I grabbed some paper and let them go at it!
Making footprints is really slippery, so I made sure to hold them steady as they squished their toes in the paint.
I can't wait for hot summer days when we can do body painting outside on the grass!
Wednesday, April 27, 2011
Friday, April 22, 2011
Shrinky Dink Beading and Splat Painting!
As I mentioned last week, we began our final class of the session making "Shrinky Dinks" (I was inspired by art teacher, Erin, from Laugh Paint Create). The 2s classes drew with colored Sharpies on large sheets of shrinking plastic. Then I punched a hole in the top before baking them so the kids could make them into window hangings.
For the rest of the window hanging, the children beaded a string that will be tied to the finished Srinky Dink.
The 3s/4s kids made small Shrinky Dinks the week before to make jewelry. Once they had strung half of the beads for the necklace, I showed them how to add the Shrinky Dink on as a pendant.
Then they helped each other!
After Shrinky Dinks and beading, I brought out some materials to try a super fun throwing "splat" painting. The kids first began to do their own thing, excited to use the spray bottles and paint, but soon got really into the splat painting!

and threw it to make a splat!
The kids got really creative with it too!
So much Fun!
For the rest of the window hanging, the children beaded a string that will be tied to the finished Srinky Dink.
The 3s/4s kids made small Shrinky Dinks the week before to make jewelry. Once they had strung half of the beads for the necklace, I showed them how to add the Shrinky Dink on as a pendant.
Then they helped each other!
After Shrinky Dinks and beading, I brought out some materials to try a super fun throwing "splat" painting. The kids first began to do their own thing, excited to use the spray bottles and paint, but soon got really into the splat painting!
First they covered some cotton balls in watery paint...
Then grabbed a soaked cotton ball from the plate...

and threw it to make a splat!
The kids got really creative with it too!
So much Fun!
Monday, April 11, 2011
Ice Painting and Tape Resit Watercolor
Now that the weather is warming up, I decided to try out ice painting this week! To start, each child was given thick watercolor paper, powdered tempera paint, and an ice cube on a stick. They sprinkled the powered paint onto their paper, then moved it around with their ice cubes. As the ice began to melt, the powdered paint turned into a liquid paint.
After experimenting with the ice cubes, I gave each child a scoop of crushed ice to stir around their paper.
When the ice wasn't melting fast enough, the children used water and a sponge to get the process going faster.
Of course glitter was a necessary addition to their painting!
Some of the kids added coarse salt, which soaks up the water and makes interesting designs in the paint.
After ice paining, the children worked on tape resist paintings. They stuck tape and contact paper (cut into shapes) onto their paper, then they sprayed it with watercolor paint. When the paper dries, they can peel off the tape-which resisted the paint- and find their design!
In the oldest class, we worked on "Shrinky Dinks" that we'll be using for our project next week. Here's a sneek peek of what's to come for our final class of the session!
Tuesday, April 5, 2011
Mixing Paste for Collage, Painting with Cars and Balls
We began this week by mixing our own colored paste of flour, water, tempera, and sand. The flour, water, and sand mixture creates a thick bonding paste that can be used as a base for a collage (and the tempera adds color for fun!).
After mixing their paste, I offered the children scraping tools to move the paste around their tagboard. They used small rakes, plastic putty knives, scrub brushes, combs, and plastic notched scrapers for tiling. This is a great introduction to making mosaics! The kids learn how to spread out the adhesive, and lay down materials into a design. After they master this technique, we can try grouting!
After plenty of spreading and scraping, the children added collage materials to their paste.
The oldest class did this project last session, so I took it to the next level and offered them cardboard frames (that I cut out of a large box) as a base for their collage.
Although I explained that the paste would work as glue, some kids weren't convinced and used white glue to make sure their items would stay put.
Towards the end of class I rolled out a large paper onto the floor and showed the kids how to have "zooming car races." Two of the cars are the kind that wind up and drive by themselves. They dipped the wheels in paint, and raced them down the paper to see which cars went the fastest and how far the tracks would go.
The weather has been gorgeous lately, so we spent some fun, creative time outside as well.
After getting this large box with my new outdoor table, I decided to use it for ball painting!
Window painting!
For her grandma's birthday, Karuna wanted to give her the frame she made so I taped a photo of her behind the opening. Adorable!
Subscribe to:
Posts (Atom)


